Archive
HOW TO INSTALL AND CONFIGURE DEPLOYSTUDIO WITH NETBOOT
Imaging is a central and key preoccupation for any company’s IT department. Although Mac OS X comes with a pretty good utility for imaging, there are also some great third parties imaging solutions for mass deployment of OS X and software packages.
For this article, we have chosen DeployStudio, which is one of the most used in the industry. Plus, it is free.
DeployStudio can actually be installed and run from any external drive large enough to hold the software, a basic OS X install, and your images and installers; but the best and most convenient DeployStudio setup will use NetBoot to simplify the imaging process. We will only focus on integrating DeployStudio with NetBoot. Configuring workflows and creating as well as restoring images , however, will work the same way.
Here are the steps to install and configure DeployStudio:
1- First of all, we need to create a SharePoint with AFP permissions to and start the NetBoot Service
a- To do so, open the Server app
b- Turn on the File Sharing Service
c- Next, Click on the + button to add the folder you want to share
d- Next, Click the gear button to edit the Share Point Permissions. Make sure that the user that is going to be used has Read & Write permissions to the share
e- Next, Click on Done
f- Next, Click on the Server Admin App
g- Authenticate if asked to,
h- Next, Click on Services
i- Select NetBoot and Click on Save
j- Next select Netboot under your server, then the Settings tab,
k- Under the General sub-Tab, Enable the Ethernet port by selecting it; then, Select the Volume where the images and Clients data are going to be put by checking both Images and Client Data boxes
l- Next Click on Save
Note:
Please note that the Netboot service won’t start until we create a Netboot set which we will do later on with DeployStudio. After the creation of this Netboot set, we will come back here and continue with step m.
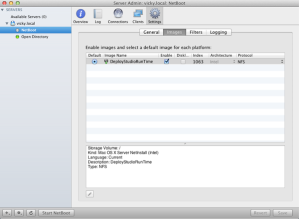
m- Click on the Images sub-tab and Select the Netboot set we created with DeployStudio as the default and Click on Save
n- Next, click on Start Netboot
2- Now let’s, let’s download the latest version from this link:
http://www.deploystudio.com/Home.html
3- Double-click on the downloaded dmg file,
4- Next double-click on the mpkg file to launch the installation,
5- After the installation, Click on the Apple menu and launch System preferences,
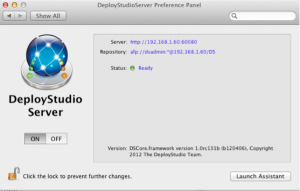
6- Next Select DeployStudio Server under the Other section,
7- At this point you should be presented with a screen that looks like this:
8- Next, Click on Launch Assistant
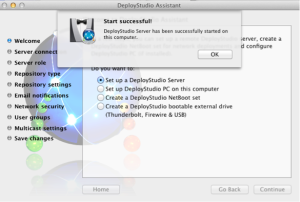
Note: At this point, DeployStudio Assistant should give a warning message asking to start Server. Click on Start
You should get a successful start message if everything went well.
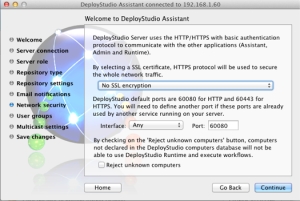
9- Next, select the Set up a DeployStudio Server option and click on Continue
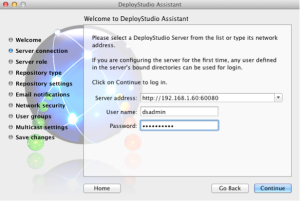
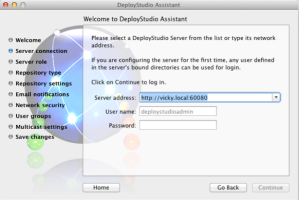
10-Next, under Server address, replace the server name by its IP address for best practice, and enter the appropriate credentials
11-Next Select the a master option and click on Continue
12-Next Select the a network SharePoint and click on Continue
13-Next, enter the URL for the SharePoint we created earlier and the appropriate credentials and click on Continue
Example: afp://192.168.1.60/DS
14- From here, everything else is optional, so let’s just leave it as the default ones
15-Next Click on OK to save the Settings
16-Next, press the COMMAND + Q keystroke to quit the Assistant
17-IF everything went ok, you should get something that looks like this:
18-Next we need to create a Netboot set with DeployStudio
a- On a Client, follow step 2 to 6
b- Next, Click on Launch Assistant
Note: At this point, DeployStudio Assistant should give a warning message asking to start Server. Click on Ignore
c- Next, Select Create a DeployStudio Netboot set and click on Continue
d- Next, Click on Continue
e- Next, Rename the System name if you want to and, click on Continue
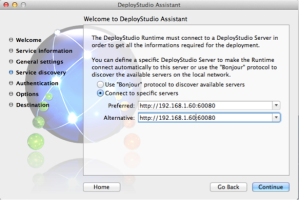
f- Next, change the server name to its IP address for best practices on both the Preferred and the Alternative
g- Next, provide a default login credential if you don’t want to enter it at every netboot. Otherwise, clear the fields, and click on Continue
h- Next, Select the Optional tools you may need with your netboot set and click on Continue
i- Next Choose a local folder as the Destination, and click on Continue
j- Next authenticate if prompted to and click on OK
Note: At this point, the Netboot set should start being created. We will move this set to the /Library/NetBoot/NetBootSPO folder on the server afterwards
k- After the Netboot set creation is finished, click on Ok, and quit the Assistant
l- Next, from the Server, click on the Go Menu
m- Next, Click on Connect to Server
n- Next, put in the Client IP address and authenticate with the client local admin credential
o- Next Browse the folder where you save the NetBoot set back in step j
p- Copy the Netboot set to the /Library/NetBoot/NetBootSPO
q- At this point, return the step 1-m, complete it and we should be done
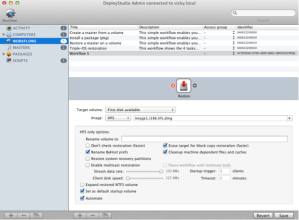
r- Next, reboot your under Utilities on the server, launch DeployStudio Admin and authenticate
s- Next, reboot your client while holding the N key
Note: You should boot to the DeployStudio Runtime. Authenticate if asked to.


